运用三大框架,使用MyEclipse帮我们导入jar包会发现有些包冲突了或者有些包是多余的,让我们来手动配置三大框架吧!
1、下载三大框架的必备的jar包,下载地址:http://download.csdn.net/detail/harderxin/4420066
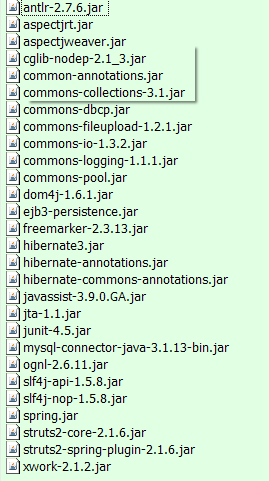
2、新建一个web工程SSHTest,将jar包导入到工程中,注意导入进去后在WEB-INFO目录的lib文件夹中要有相应的jar包,jar包如下
3、打开web.xml,在里面添加如下代码:
//Spring配置
        <listener>
		<listener-class>org.springframework.web.context.ContextLoaderListener</listener-class>
		<!-- default: /WEB-INF/applicationContext.xml -->
	</listener>

	<context-param>
		<param-name>contextConfigLocation</param-name>
		<!-- <param-value>/WEB-INF/applicationContext-*.xml,classpath*:applicationContext-*.xml</param-value>  -->
		<param-value>classpath:beans.xml</param-value>
	</context-param>
//Struts配置
	<filter>
		<filter-name>struts2</filter-name>
		<filter-class>org.apache.struts2.dispatcher.ng.filter.StrutsPrepareAndExecuteFilter</filter-class>
	</filter>

	<filter-mapping>
		<filter-name>struts2</filter-name>
		<url-pattern>/*</url-pattern>
	</filter-mapping>
4、打开Struts.xml,配置Struts一些常量,并将stsruts交给Spring容器来管理
<?xml version="1.0" encoding="UTF-8" ?>
<!DOCTYPE struts PUBLIC
    "-//Apache Software Foundation//DTD Struts Configuration 2.0//EN"
    "http://struts.apache.org/dtds/struts-2.0.dtd"><struts>

	<constant name="struts.configuration.xml.reload" value="true"/>
	<constant name="struts.action.extension" value="action,do,webwork" />

	<constant name="struts.enable.DynamicMethodInvocation" value="true" />
        <constant name="struts.devMode" value="true" />
	<constant name="struts.multipart.maxSize" value="100971520"></constant>
	<constant name="struts.i18n.encoding" value="UTF-8"></constant>
	<constant name="struts.objectFactory.spring.autoWire" value="name"></constant>
	<!-- 将struts2交给spring管理-->
	<constant name="struts.objectFactory" value="spring"></constant>
	<constant name="struts.custom.i18n.resources" value="messages"></constant>

	<include file="strutsConfig/common.xml"></include>
	<include file="strutsConfig/struts-test.xml"></include>
	<include file="strutsConfig/struts-admin.xml"></include>
	<include file="strutsConfig/struts-web.xml"></include>
	<include file="strutsConfig/struts-admin.xml"></include>
	<include file="strutsConfig/struts-consumer.xml"></include>
	<include file="strutsConfig/struts-restaurant.xml"></include>
	<include file="strutsConfig/struts-web.xml"></include>
</struts>
5、打开Spring,配置连接池和事务
<?xml version="1.0" encoding="UTF-8"?>
<beans xmlns="http://www.springframework.org/schema/beans"
	xmlns:xsi="http://www.w3.org/2001/XMLSchema-instance"
	xmlns:context="http://www.springframework.org/schema/context"
	xmlns:aop="http://www.springframework.org/schema/aop"
	xmlns:tx="http://www.springframework.org/schema/tx"
	xsi:schemaLocation="http://www.springframework.org/schema/beans
           http://www.springframework.org/schema/beans/spring-beans-2.5.xsd
           http://www.springframework.org/schema/context
           http://www.springframework.org/schema/context/spring-context-2.5.xsd
           http://www.springframework.org/schema/aop
           http://www.springframework.org/schema/aop/spring-aop-2.5.xsd
           http://www.springframework.org/schema/tx
           http://www.springframework.org/schema/tx/spring-tx-2.5.xsd">
	<context:annotation-config />
	<context:component-scan base-package="com.bjsxt" />

	<!--
		<bean id="dataSource"
		class="org.apache.commons.dbcp.BasicDataSource"
		destroy-method="close">


		<property name="driverClassName" value="com.mysql.jdbc.Driver" />
		<property name="url" value="jdbc:mysql://localhost:3306/spring" />
		<property name="username" value="root" />
		<property name="password" value="bjsxt" />
		</bean>
	-->

	<bean
		class="org.springframework.beans.factory.config.PropertyPlaceholderConfigurer">
		<property name="locations">
			<value>classpath:jdbc.properties</value>
		</property>
	</bean>

	<bean id="dataSource" destroy-method="close"
		class="org.apache.commons.dbcp.BasicDataSource">
		<property name="driverClassName"
			value="${jdbc.driverClassName}" />
		<property name="url" value="${jdbc.url}" />
		<property name="username" value="${jdbc.username}" />
		<property name="password" value="${jdbc.password}" />
	</bean>


	<bean id="sf"
		class="org.springframework.orm.hibernate3.annotation.AnnotationSessionFactoryBean">
		<property name="dataSource" ref="dataSource" />
		<!--
		<property name="annotatedClasses">
			<list>
				<value>com.bjsxt.model.User</value>
				<value>com.bjsxt.model.Log</value>
			</list>
		</property>
		 -->
		 <property name="packagesToScan">
			<list>
				<value>com.bjsxt.registration.model</value>

			</list>
		</property>
		<property name="hibernateProperties">
			<props>
				<prop key="hibernate.dialect">
					org.hibernate.dialect.MySQLDialect
				</prop>
				<prop key="hibernate.show_sql">true</prop>
			</props>
		</property>
	</bean>

	<bean id="hibernateTemplate" class="org.springframework.orm.hibernate3.HibernateTemplate">
		<property name="sessionFactory" ref="sf"></property>
	</bean>

	<bean id="txManager"
		class="org.springframework.orm.hibernate3.HibernateTransactionManager">
		<property name="sessionFactory" ref="sf" />
	</bean>

	<aop:config>
		<aop:pointcut id="bussinessService"
			expression="execution(public * com.bjsxt.registration.service.*.*(..))" />
		<aop:advisor pointcut-ref="bussinessService"
			advice-ref="txAdvice" />
	</aop:config>

	<tx:advice id="txAdvice" transaction-manager="txManager">
		<tx:attributes>
			<tx:method name="exists" read-only="true" />
			<tx:method name="add*" propagation="REQUIRED"/>
		</tx:attributes>
	</tx:advice>

</beans>
6、添加相应实体类的XXX.hbm.xml文件映射
<?xml version="1.0" encoding="utf-8"?>
<!DOCTYPE hibernate-mapping PUBLIC "-//Hibernate/Hibernate Mapping DTD 3.0//EN"
"http://hibernate.sourceforge.net/hibernate-mapping-3.0.dtd">
<!--
    Mapping file autogenerated by MyEclipse Persistence Tools
-->
<hibernate-mapping>
    <class name="com.jwjx.beans.DatePlanPri" table="DATEPLAN_PRI" schema="ADMIN">
        <id name="rjhmid" type="java.lang.Long">
            <column name="RJHMID" />
            <generator class="increment" />
        </id>
        <property name="jctype" type="java.lang.String">
            <column name="JCTYPE" length="20" />
        </property>
        <property name="jcnum" type="java.lang.String">
            <column name="JCNUM" length="20" />
        </property>
        <property name="fixfreque" type="java.lang.String">
            <column name="FIXFREQUE" length="20" />
        </property>
        <property name="kcsj" type="java.lang.String">
            <column name="KCSJ" length="20" />
        </property>
        <property name="jhqjsj" type="java.lang.String">
            <column name="JHQJSJ" length="20" />
        </property>
    </class>
</hibernate-mapping>
7、将项目部署到Tomcat服务器,如果启动过程中没有报错,说明ssh三大框架配置OK!大家试一试吧
分享到:


相关推荐
一个简单的spring+struts2+hibernate+mybatis整合(数据库脚本放在项目资源文件的sql目录下) 因为没想好mvc用springmvc好,还是struts2好 所以没有整合进去
SSH+Redis整合
针对web开发中的ssh的搭建思路及具体的实施步骤,
一个spring+struts+hibernate的例子,是eclipse的工程,用tomcat5和mysql,文件夹下包含所有的源码和库,另外还有一个.sql的文件用于建立数据库。大家觉得它有什么不好,欢迎交流
Spring+Struts2+Hibernate三大框架开发校园精品课程网源代码下载
spring+struts+hibernate框架,内容空
spring +struts + hibernate 例子 spring +struts + hibernate 例子 spring +struts + hibernate 例子
maven整合spring+hibernate+struts2
Hibernate+Spring+Struts2+ExtJS开发CRUD功能 ,里面包含源码及安装说明文档。可以作为项目开发的基础框架。
Java-Spring+Struts+Hibernate-SSH框架整合01-Spring+Hibernate(一步一步的教你敲代码)(博客园,博客名称:Java-Spring+Struts+Hibernate-SSH框架整合01-Spring+Hibernate)
ssh三大框架的整合步骤,非常详细。包含spring整合struts、spring整合hibernate、声明式事务说明等。
spring+struts2+hibernate框架整合,简单的demo,有需要可以参考参考
根据对三大框架的了解,该文件详细的描述了三大框架是如何整合到一起的(两种方法)
《开发者突击:Java Web主流框架整合开发(J2EE+Struts+Hibernate+Spring)》详细介绍了Java Web软件架构中的各种开发技术。主要内容包括:以MySQL为数据库、Tomcat为Web服务器、Eclipse为开发工具、CVS为版本控制工具...
MySQL数据库,完整备份
简单的SSH项目 使用spring+hibernate+struts2 有详细的创建项目笔记 代码配置都有注释
三大框架源码,可用,2分共享与大家!下载后可直接嵌入到jar包中!
学生选课管理系统(v1.0)是基于SSH框架做成的,它可以满足一般学校的需求,是一个不错的系统。
希望此套框架整合对深入了解和学校Struts2+Spring4+Hibernate4三大框架整合技术有帮助
基于Spring+Struts+Hibernate注塑模具报价系统的研发.docx基于Spring+Struts+Hibernate注塑模具报价系统的研发.docx基于Spring+Struts+Hibernate注塑模具报价系统的研发.docx基于Spring+Struts+Hibernate注塑模具...